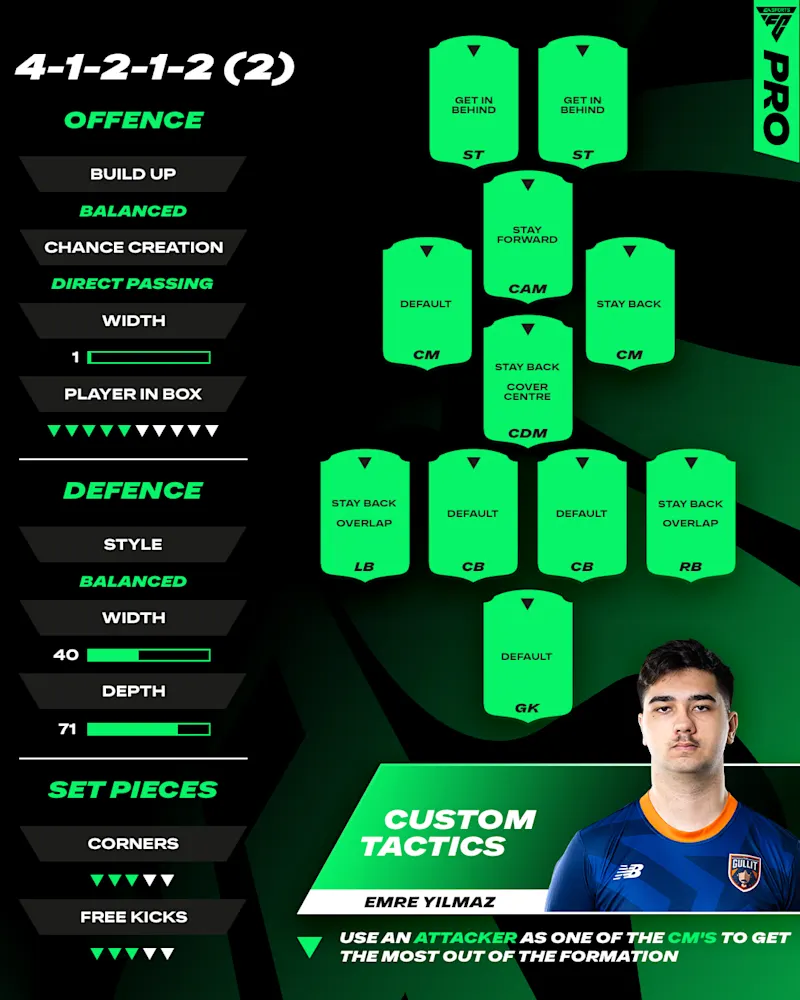
The tactic begins with a defensive width of 40 that helps against cutbacks, while he has also opted to deploy 71 depth to enjoy the benefit of a strong high press from the front. Pros have been split in terms of some defensive instructions so far, and Emre leaves his goalkeeper on default, and his full-backs are handed the popular ‘stay back while attacking’ instruction.
The central defensive midfielder (CDM) is placed on 'stay back while attacking and cover center,' and the right center midfielder (RCM) is also a more defensive-minded player instructed to stay back – and it is recommended that players with high defensive work rates are selected in these roles.
A balanced build-up style in attack and direct passing preference is selected in this one, but it gets interesting when it comes to his attacking width – which is placed at the lowest possible setting of 1. This instructs players to get close to each other during attacking phases, enabling a tiki-taka style that can force opposition defenders into mistakes when performed quickly.
Emre’s tactic also provides freedom to the left-sided midfielder, who is left on default settings to allow them to provide the link from midfield to attack, and Emre advises that this player is an attacker to get the most out of the formation. Of course, some options may not fit into this role directly – for example, if you want to use someone like Ousmane Dembele, whose preferred position is on the wing - so make sure to set up a different starting formation to keep the benefits of max chemistry before switching to Emre’s narrow diamond in-game.
Finally, the central attacking midfielder (CAM) is told to stay forward which creates the classic triangle between the CAM and two strikers, who Emre instructs to get in behind, and of course a pacey pairing will be best suited here.
Check out the graphic below for a rundown of how to set up the custom tactic, and as always, be sure to let us know how you get on this week by keeping in touch at @EASportsFCPro on X.

